

How to Make Coffee Caramels: Soft, Chewy Recipe
Make soft, chewy coffee caramels at home by cooking the sugar mixture to 245°F and infusing with dissolved instant espresso or concentrated brewed coffee. One standard batch yields a typical amount of caramels, poured into a lined 8x8-inch pan.
Here’s what you need at a glance:
- Sugar: 1½ cups granulated white sugar
- Corn syrup: ½ cup light corn syrup (or glucose syrup)
- Heavy cream: 1 cup, warmed
- Butter: 6 tablespoons unsalted, cubed
- Salt: ½ teaspoon fine sea salt
- Vanilla: 1 teaspoon pure extract
- Coffee: 2–3 teaspoons instant espresso powder or 3 tablespoons concentrated brewed espresso
Temperature target: 245°F for soft and chewy (firm-ball stage); 248–250°F for a firmer chew. A reliable candy thermometer is non-negotiable.
Total time runs 40–60 minutes at the stove, depending on your pan and burner. Equipment: a heavy-bottomed saucepan and a digital candy thermometer.
Table of Contents
- What goes into one batch of coffee caramels?
- Do you have the right equipment?
- How to make coffee caramels, step by step
- Which coffee infusion method gives you the boldest flavor?
- What went wrong? Troubleshooting common problems
- How to store, wrap, and gift your caramels
- Easy variations to make the batch your own
- Can you use yacon syrup instead of corn syrup?
- Key Takeaways
- The table is the whole point
- Yakonow yacon syrup: the small swap worth trying
- Useful sources and further reading
What goes into one batch of coffee caramels?
A precise shopping list saves you mid-cook panic. Below are the quantities for one standard slab, plus notes on why each ingredient earns its place.
Ingredient list
| Ingredient | Amount | Notes |
|---|---|---|
| Granulated white sugar | 1½ cups | Base sweetener; caramelizes to develop flavor |
| Light corn syrup | ½ cup | Prevents crystallization; keeps texture smooth |
| Heavy cream | 1 cup | Fat and protein interrupt crystal formation |
| Unsalted butter | 6 tablespoons | Adds richness; also blocks crystallization |
| Fine sea salt | ½ tsp | Balances sweetness; add more to finish |
| Pure vanilla extract | 1 tsp | Added off-heat to preserve aroma |
| Instant espresso powder | 2–3 tsp | Dissolves cleanly into warmed cream |
| OR concentrated espresso | 3 tbsp | Reduced brewed coffee; add near the end |
Why corn syrup? Fats from butter and proteins from cream interrupt sugar crystallization, giving you that smooth, pull-apart chew. Corn syrup does the same job at the sugar level, keeping sucrose molecules from linking back into crystals. Without it, you risk a grainy batch.
Vanilla and salt go in off the heat. Heat destroys vanilla’s volatile aromatics fast, and salt added at the end reads brighter on the palate than salt cooked into the sugar.
Yacon syrup substitution
You can replace up to 25–30% of the corn syrup with Yakonow yacon syrup without destabilizing the set. Yacon syrup carries a gentle, molasses-adjacent sweetness that deepens the coffee notes beautifully. Because it adds a small amount of extra moisture, cook the batch 1–2 minutes longer or target the upper end of your temperature range (247–248°F instead of 245°F). Start with a test batch before gifting.
Do you have the right equipment?
Wrong tools are the most common reason a first caramel batch fails. Get these in place before you turn on the burner.
- Heavy-bottomed saucepan (3–4 quart): Distributes heat evenly and gives the mixture room to foam up dramatically when cream hits hot sugar. A thin pan scorches the bottom before the center catches up.
- Digital candy thermometer: Color alone misleads you. Thermal momentum means the sugar keeps rising even after you pull it from the heat, so you need a real-time reading, not a guess.
- Heatproof silicone spatula: For folding in butter and cream without scratching the pan.
- Whisk: Useful for the initial sugar-and-syrup combine.
- 8x8-inch baking pan: Lined with parchment and lightly greased. A 9x9 pan works but produces thinner caramels.
- Wet pastry brush: For washing down sugar crystals from the pot sides.
Pro Tip: Calibrate your thermometer before you start. Drop it into boiling water — it should read 212°F. If it reads 210°F, your caramels are done at 243°F, not 245°F. Two degrees off sounds minor; in candy-making, it changes the texture entirely.
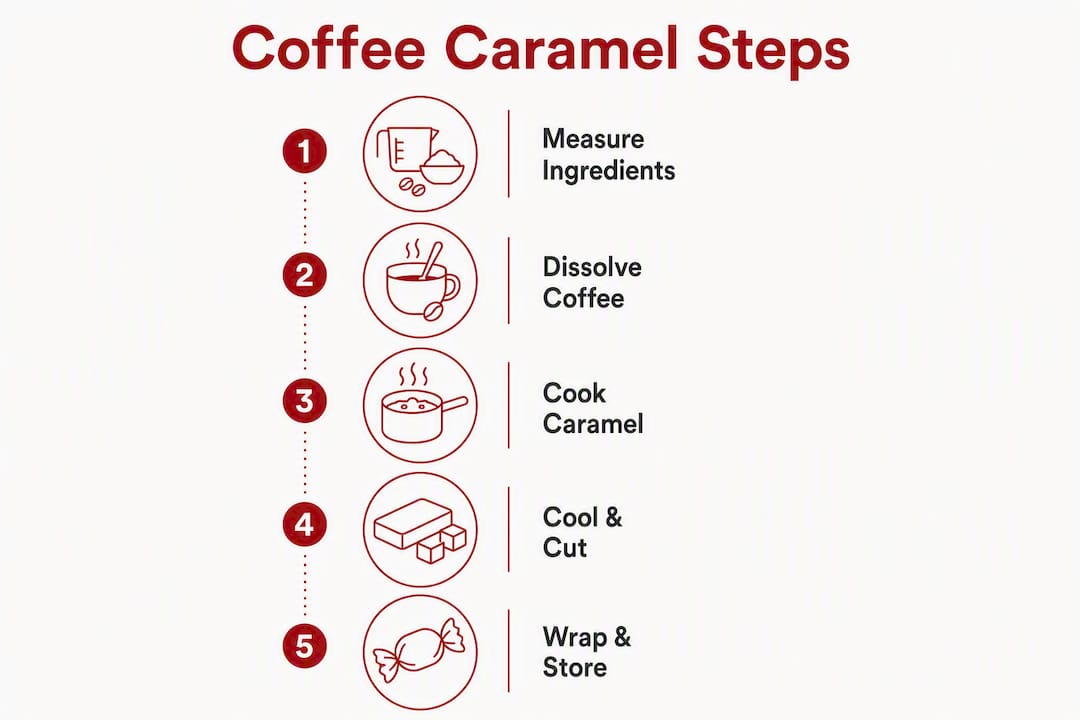
How to make coffee caramels, step by step
Total cook time: 40–60 minutes from first heat to pour. Read through once before you start.
-
Prepare your pan. Line an 8x8-inch pan with parchment, leaving overhang on two sides. Lightly grease the parchment with butter or neutral oil. Set it near the stove.
-
Warm the cream. Gently heat the heavy cream in a small saucepan or microwave until it reaches 122–140°F. If you’re using instant espresso, dissolve it into the warm cream now and set aside. Cold cream hitting hot caramelized sugar can cause the fat to split and seize.
-
Combine sugar and corn syrup. In your heavy-bottomed saucepan, stir together the sugar, corn syrup, and 2 tablespoons of water over medium heat until the sugar dissolves. Once it begins to boil, stop stirring entirely.
-
Cook to amber. Let the mixture cook undisturbed. If crystals form on the sides of the pot, brush them down with your wet pastry brush. Watch for a deep golden-amber color — this is where caramel flavor develops its complexity, with nuttier, slightly roasted notes emerging at darker stages. Don’t rush it.
-
Add butter. Once the sugar reaches a rich amber, add the cubed butter a few pieces at a time, stirring gently. The mixture will bubble vigorously.
-
Stream in the warm cream. Pour the warmed cream in slowly, stirring constantly. The mixture will foam up hard — this is normal. Keep stirring until fully combined.
-
Cook to temperature. Clip your thermometer to the pot. Cook over medium heat, stirring occasionally, until the mixture reaches 245°F for soft and chewy caramels, or 248–250°F for a firmer bite. Watch closely from 230°F onward — the temperature climbs faster as moisture evaporates.
-
Finish off the heat. Remove from the burner. Stir in the vanilla extract, salt, and (if using concentrated brewed espresso) the coffee now. Pour immediately into the prepared pan without scraping the pot sides.
-
Cool and cut. Let the slab cool at room temperature for at least 2 hours, or until fully set. Lift out using the parchment overhang. Cut with a sharp, non-serrated knife.
Visual cue: When the cream hits the sugar, the mixture turns from clear amber to a vigorous, pale-tan boil. Once it calms and deepens back to a rich caramel color, you’re on track.
Pro Tip: From 230°F to 245°F, the temperature can jump 5–8 degrees in under a minute. Stay at the stove and stir gently but constantly during this final stretch.
Which coffee infusion method gives you the boldest flavor?
Two methods work reliably at home. The right one depends on how much equipment you want to use and how intense you want the coffee flavor.

Method A: Dissolved instant espresso powder
Stir 2–3 teaspoons of high-quality instant espresso powder into your warmed cream before adding it to the sugar. This method delivers bold coffee flavor without thinning the caramel, because the powder dissolves completely and adds almost no extra liquid. It’s the faster, more controlled option.
- Mild flavor: 1½ teaspoons per batch
- Medium: 2–2½ teaspoons
- Bold: 3 teaspoons or more
Use a specialty-grade instant espresso for the cleanest roast notes. A good starting point is a specialty instant coffee that dissolves fully without leaving grit.
Method B: Concentrated brewed espresso
Brew a double or triple espresso shot and reduce it by half in a small saucepan, or use a stovetop moka pot concentrate. Add 3 tablespoons near the end of cooking, after the cream is incorporated. Adding coffee near the end preserves brightness; adding it at the start deepens the roasted character but risks bitterness.

The tradeoff: concentrated brewed espresso adds more liquid than powder, which can soften the final set slightly. Compensate by cooking 1–2 degrees higher (to 247°F instead of 245°F).
Pro Tip: Before you pour the caramel into the pan, dip a clean spoon into the mixture and taste it once it cools for 10 seconds. If the coffee flavor feels muted, stir in an extra ½ teaspoon of dissolved espresso powder off the heat. You have a short window to adjust.
For a deeper look at how coffee infusion techniques affect flavor integration, the J Coffee Collection’s guide is worth a read before you choose your method.
What went wrong? Troubleshooting common problems
Most caramel failures trace back to temperature, cream temperature, or stirring at the wrong moment.
-
Grainy texture: Almost always crystallization. You likely stirred during the boil or crystals fell from the pot sides into the mixture. Brush the sides down with a wet pastry brush and never stir once the sugar boils. To rescue a grainy batch, return it to the pot with 2 tablespoons of water, rewarm gently until smooth, then re-cook to temperature.
-
Separated or curdled mixture: Cold cream hit hot sugar. The fat splits and pools on top. Next time, warm cream to 122–140°F before adding. To rescue: return to low heat and whisk steadily — it often comes back together.
-
Too soft / won’t set: Undercooked. The mixture didn’t reach 245°F, or your thermometer reads low. Return the slab to the pot, melt it down, and re-cook to the correct temperature. At altitude, subtract roughly 2°F from your target for every 1,000 feet above sea level.
-
Too hard or brittle: Overcooked past 250°F. You can’t un-cook caramel, but you can melt the batch down with a splash of cream and turn it into a pourable coffee caramel sauce — excellent over ice cream or stirred into a latte.
-
Scorched or burnt flavor: Dark brown color and a sharp, acrid smell mean the sugar went too far. There’s no rescue here. Discard, clean the pot thoroughly, and start fresh with a lower flame.
Pro Tip: If you’re baking at altitude (above 3,500 feet), test your boiling-water temperature first. Water boils below 212°F at elevation, which shifts every candy stage downward. Adjust your target accordingly.
How to store, wrap, and gift your caramels
A well-made batch keeps beautifully when handled right.
- Cool completely at room temperature before cutting — at least 2 hours, ideally 4. Refrigerating a warm slab can cause it to crack when cut.
- Cut with a sharp, non-serrated knife. Warm the blade briefly under hot water and wipe dry between cuts for clean edges. Aim for pieces roughly 1" x 1½".
- Wrap individually in 4"x4" squares of wax paper or cellophane, twisting the ends. This prevents the caramels from sticking together and keeps moisture out.
- Store at room temperature in an airtight container for up to 2 weeks. Refrigeration extends shelf life to 4–6 weeks but can make the caramels slightly firmer; bring to room temperature before serving.
- Freeze for up to 3 months in a single layer, wrapped individually, then transferred to a zip-top bag.
For gifting:
- Sprinkle flaky sea salt on the slab immediately after pouring, before it sets.
- Stack wrapped caramels in a small kraft box or glass jar tied with twine.
- A simple label listing the flavor (“espresso caramel, sea salt”) makes the gift feel considered.
Easy variations to make the batch your own
Once you have the base recipe down, small additions take it somewhere new.
- Flaky sea salt finish: Maldon or fleur de sel pressed lightly onto the poured slab before it sets. The contrast with bitter espresso is the whole point.
- Chocolate-dipped: Let the cut caramels chill for 15 minutes, then dip in tempered dark chocolate (70% cacao works well with coffee). Set on parchment at room temperature.
- Brown-butter variation: Brown the butter in the pan before adding sugar. The nutty, toasty notes layer beautifully with espresso. Add a strip of orange zest to the cream while warming, then remove before pouring.
- Bourbon or coffee liqueur: Stir 1 tablespoon of bourbon or coffee liqueur into the mixture off the heat, right before vanilla. Most of the alcohol evaporates; what remains adds depth without a boozy finish.
- Toasted nuts: Press chopped toasted pecans or hazelnuts into the top of the poured slab before it sets.
Can you use yacon syrup instead of corn syrup?
Yes, with a few adjustments. Liquid sweeteners like yacon syrup change the water activity and final set of the caramel, so a straight one-for-one swap with corn syrup isn’t the move.
Partial substitution (recommended for first-timers): Replace up to 25–30% of the corn syrup with Yakonow yacon syrup. At this ratio, the texture stays chewy and the set is reliable. The yacon adds a subtle, earthy sweetness that complements espresso without competing with it. Cook to 247°F instead of 245°F to account for the extra moisture.
Full corn-syrup substitution: Possible, but the caramel will be softer and may not hold its shape as well at room temperature. If you go this route, cook to 248–250°F and store the caramels in the refrigerator.
Replacing part of the granulated sugar: You can swap up to 15% of the white sugar with yacon syrup (reduce cream by 1 tablespoon to compensate). This approach adds complexity to the base flavor without significantly affecting texture.
For a full guide to baking with yacon syrup and substitution ratios across different recipes, Yakonow’s baking guide covers the details. Celeste’s piece on sweetener transitions for families is also worth reading if you’re gradually reducing refined sugar in your kitchen.
Pro Tip: Always test a small batch (half the recipe) before making a full gift batch with a new substitution ratio. Caramel is forgiving in flavor but unforgiving in texture.
Three Yakonow options for this recipe:
- Single 6oz bottle: Perfect for a trial batch or one-time substitution.
- Pack of 2: Good for regular home bakers who use it across multiple recipes.
- Pack of 4: The right call if you’re making caramels for gifting season and want it on hand for pancakes and oatmeal too.
Key Takeaways
Soft, chewy coffee caramels require cooking to exactly 245°F, choosing the right coffee infusion method, and warming your cream before it touches hot sugar.
| Point | Details |
|---|---|
| Temperature is everything | Cook to 245°F for soft-chewy; 248–250°F for a firmer bite. Calibrate your thermometer first. |
| Two reliable infusion methods | Dissolved instant espresso (cleaner, easier) or concentrated brewed espresso (brighter, needs temp adjustment). |
| Warm cream prevents splitting | Heat cream to 122–140°F before adding to hot sugar to avoid separation and graininess. |
| Storage and shelf life | Wrapped individually in wax paper, caramels keep 2 weeks at room temperature or up to 6 weeks refrigerated. |
| Yakonow as a corn-syrup swap | Replace up to 25–30% of corn syrup with Yakonow yacon syrup; cook to 247°F to compensate for extra moisture. |
The table is the whole point
There’s something about wrapping caramels by hand that slows the week down in the best way. You make a batch on a Saturday morning, the kitchen smells like espresso and brown sugar, and by afternoon you have forty little gifts ready to tuck into boxes or set out on a cheese board. That’s the version of hosting I keep coming back to: the thing that took effort but doesn’t look like it did.
Coffee caramels are one of those recipes that feel harder than they are. Once you’ve made them twice, the thermometer becomes second nature and the whole process feels almost meditative. The Yakonow swap is a small detail I like for batches I’m sharing with family — not because it changes the recipe dramatically, but because it adds a layer of flavor that makes people ask what’s different. That’s the best kind of ingredient: one that works quietly.
Make a batch for someone. Wrap them in wax paper, tie them with twine, and leave them on a counter where people gather. The caramels will disappear faster than you expect.
Yakonow yacon syrup: the small swap worth trying

If you’ve made it to the end of this recipe, you already know that coffee caramels are more forgiving than they look. Adding Yakonow to the mix is the kind of small change that makes a batch feel a little more yours.
Replace up to 25–30% of the corn syrup with Yakonow yacon syrup, cook to 247°F, and the result is a caramel with a deeper, more complex sweetness that pairs especially well with espresso. It also works as a finishing drizzle over the cut slab before serving, or stirred into a quick caramel latte on a slow morning.
Three ways to stock up:
- Single 6oz bottle: Try it once before committing.
- Pack of 2: For the kitchen that uses it across breakfast and baking.
- Pack of 4: For gifting season, when you’re making caramels in bulk and want it on hand for everything else too.
Order directly at yakonow.co and have it ready before your next batch.
Useful sources and further reading
The sources below informed the technique, temperature targets, and troubleshooting in this article. Each one is worth bookmarking.
| Source | Best for |
|---|---|
| ThermoWorks: How to Make Caramels | Temperature charts, cream-warming guidance, crystallization science |
| Béquet Confections: Ultimate Caramel Guide | Stage-by-stage temperature targets, thermometer use, professional technique |
| Preppy Kitchen: Soft & Chewy Homemade Caramels | Anti-crystallization technique, troubleshooting, recipe variants |
| Our Salty Kitchen: Homemade Caramel Candy | Realistic timing estimates, thermometer calibration, yield guidance |
| Terumi Morita: The Science of Caramelization | Flavor development across temperature stages, pairing with coffee roast |
| Baking With Butter: Coffee Caramel Sauce | Instant espresso infusion method, sauce variations |